
Installing and Configuring the Your Right Campaign WordPress Plugin
This guide will walk you through installing the Your Right Campaign Voter Outreach Toolkit plugin as well as configuring the basic settings of the plugin.
Before We Begin: A Note About Security
Because this plugin handles sensitive voter data, including voter addresses and contact details, it encrypts some voter data inside of your site’s WordPress database. To make this process even more secure, you can take the optional step of generating a custom encryption key and storing it in your site’s wp-config.php file. This guide will show you how to configure your site’s encryption key in your wp-config.php file for a higher level of voter data security.
This step is completely optional, but recommended before you install the plugin for the highest level of voter data security.
Installing the Plugin
The Your Right Campaign Voter Outreach plugin can be installed like any other WordPress plugin. Simply go to the Plugins section of your WordPress dashboard and click the Add Plugin button. Then find the search box in the top right and search for the keyword GOTV, which will pull up the Your Right Campaign plugin as shown below.
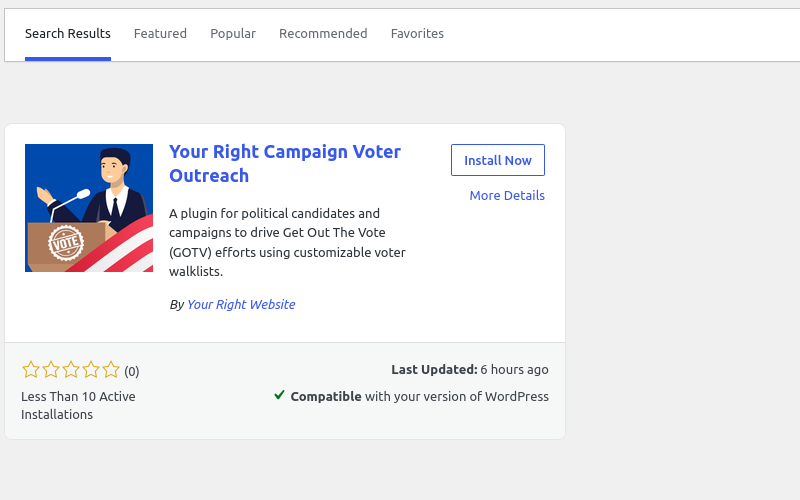
Once you’ve found the plugin, click on Install Now and then Activate to enable the plugin. You should now see the Your Right Campaign menu option in your left hand menu.
Configuring Plugin Settings
Before you begin using the plugin, you may wish to change some of the basic settings to better suit your campaign. This can be done under Your Right Campaign > Settings. Only a site administrator or a user with the GOTV Administrator role can change these settings.
Data Preservation Settings:
These settings determine what happens to all of the plugin data, including voter data, when the plugin is deleted. The default behavior is to delete all plugin data when the plugin is deleted from the WordPress plugins screen. Check the box in this section to keep all plugin and voter data when the plugin is deleted.
Note that the plugin data is only deleted when the plugin is deleted via the Plugins screen in WordPress. If you remove the plugin files another way, voter data may not properly be deleted from your site’s database on plugin deletion.
Country Settings:
This plugin is meant for United States and Canadian elections. The plugin defaults to presets for United States based elections. Changing the country here to Canada changes certain plugin language (for instance, changing State to Province) as well as enables a different set of early voting options that pertain to Canadian elections.
Voter De-Duplication Settings:
The settings in this area handle how the site determines whether an imported voter is a new voter or an existing voter. The values available here have the following effect:
- Default: ID, Phone or Email – The default option for the plugin. When a voter record is imported and the voter has the same external ID number, phone number or email address as an existing record, any new records created with one or more of these fields matching an existing voter’s record will update the existing voter, rather than create a new one. The external ID is typically assigned to a voter via a 3rd party system, such as from your local election authority. This allows you to update a voter’s data if it changes between batches of election data without losing any custom data or notes entered for the voter.
- Aggressive: Name + Address Matching – This option includes everything in the default option plus matching of voters based on name and address. If a new voter is imported and their name and address exactly match that of an existing voter, the existing record is updated rather than creating a new voter record.
- None: No De-Duplication – De-Duplication is turned off and a new voter record will always be created, even if an existing voter record exists for the voter.
Volunteer Portal Settings:
The volunteer portal is where your volunteers will go to view their walklists and interact with voter data. This section has the following settings:
- Volunteer Portal URL: This is the URL of a top-level page on your site where volunteers can view the volunteer portal. You can change the URL slug of the portal page here. The slug should contain only lowercase letters, numbers and dashes.
- Volunteer Portal Welcome Message: When a volunteer logs into the volunteer portal, this welcome message will be shown to them. Use this area to update your volunteers on your campaign’s latest news or goals or share additional instructions with volunteers. All volunteers will see the same message.
Once you have configured the plugin settings, you’re ready to import voter data from a CSV file.